Siemens PXG3 BACnet router connects a BACnet/IP network
In This Article we are going to discuss about Siemens PXG3 BACnet router connects a BACnet/IP network to a BACnet /LonTalk network (PXG3.L only) and a BACnet MS/TP channel. BACnet objects are simultaneously transmitted among any and all networks.
 |
| BACnet Router |
Firmware
updates
General:
With the devices PXG3.W100 (all versions) and PXM40 and PXM50 (>1.15.30.497) the
firmware is updated in XWP using SSA-DNT, see E-learning module Commissioning
the web server. To ensure operation of the devices on the most current firmware the current firmware must be downloaded.
PXM 40 / PXM50 ≤1.15.30.497
- As a rule, the firmware of any PXM40/50s (referred to as device) can be updated using the FWDT (Firmware Download Tool).
- This is particularly important if a Firmware update is not possible via DNT (Discovery and Node Setup Tool) due to technical issues.
- In devices with FW version ≤1.15.30.497, updating the firmware via FWDT is mandatory, to be able to update the device using DNT in the future
1. Disconnect the device from power.
2. Press/hold the Reset button, reconnect the
device to power.
3. Wait until the orange LED flashes (ca. 10 seconds),
4. Then release the Reset button.
5. Start FWDT.
6. Connect the device to the PC via USB connection (FWDT discovers the device and enters the mode specific to these devices).
 |
| Desigo FDT |
7. Group box Select the firmware version > drop down list > select the accurate firmware version for your device.
8. Click Start Loading. (FWDT starts uploading and displays a progress bar.)
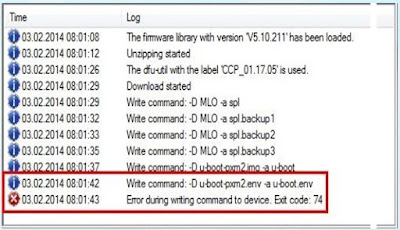
9. When the upload process has reached a certain level, an error message is displayed
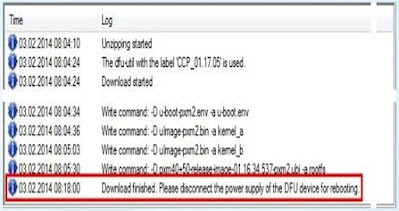
10. Repeat now steps 1-8 above.(This time the upload will completely run the process)
11. Wait until the device has restarted following upload completion.
12. Disconnect the USB connection.
Factory reset web interface PXG3.100
Given certain circumstances it may be desirable or necessary to factory reset the device. If so, please exactly follow the procedure given below.
Attention:
The device will lose any password and other settings. Only the IP network settings remain the same as before
Procedure
1. Power off device.
2. Power on device.
3. Wait for all LEDs to light up and turn off again, then
4. Press SVC button and hold until the green RUN LED flashes.
5. Then Release SVC button.
6. Wait for the device to fully start up unconfigured. (RUN LED is on, SVC LED flashes.)
7. Start firmware download process with SSA-DNT.


Comments
Post a Comment